Modular LED strip systems for versatile cove lighting
Cove lighting turns a ceiling junction, bulkhead or wall recess into a soft source that seems to come from the architecture itself. It can make a compact room feel calmer, reveal the curve of a plaster ceiling or add a controlled glow to joinery without placing a visible downlight in the middle.
A modular LED strip system takes that effect further. Standard lengths, clip-on or recessed profiles, matching diffusers, connectors and remote drivers can be combined, then altered as a room changes. The result is indirect lighting that is easier to specify, repair and expand than a fixed custom luminaire.
A flexible approach to indirect light
The advantage of modularity is that the luminous element, housing and controls are separate decisions. A designer can keep the same visual profile while changing the strip’s brightness or colour capability, replace a damaged section or extend the run later. That flexibility is useful in open-plan areas where one zone may need more light after furniture changes.
Unlike a sealed decorative fitting, modular components can be specified in metre lengths and assembled around corners. The profile conceals the LED tape, while a diffuser turns individual diodes into an even line of ambient illumination. This creates a cleaner result and also gives installers access to the hardware without opening a painted ceiling.
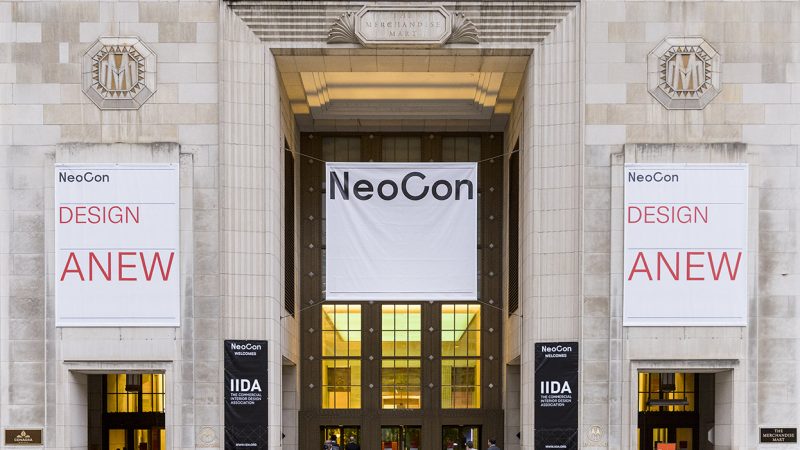
The shift towards reconfigurable lighting is visible at international design events such as Salone del Mobile and NeoCon, where manufacturers present linear profiles, tunable systems and domestic installations that blur the line between furniture and architecture. For Australian homes, the appeal is less theatrical: a living room, main bedroom or home office can gain a layered glow while retaining practical downlights for tasks.
Profiles and diffusers shape the result
A profile is more than a decorative channel. It supports the strip, provides electrical connections and usually acts as a heat sink. High-quality aluminium helps remove heat from the diodes; adequate airflow and correct fixing distance preserve output and colour consistency. A strip glued directly to timber or masonry without thermal management may produce hotspots, discolouration or an unexpectedly short service life.
Diffusers have an equally visible effect. An opal cover softens the diodes into a continuous glow, while a prismatic or lens diffuser focuses the beam. Clear, asymmetric and baffle options suit different aiming requirements, from washing a nearby wall to creating a narrow pool of light. Semi-recessed profiles reduce glare; deeper reveals create a more architectural, concealed line.
Specify the profile before the light source. A shallow ceiling may allow surface mounting, whereas a new plaster ceiling can accept a recessed channel with a matching shadow gap. The aim should be deliberate: an offset strip can make a ceiling appear to float, while a strip tucked behind a bulkhead can highlight the junction and conceal wiring. Checking a full-size sample in the room prevents expensive guesswork.
Power and placement in Australian renovations
Australian electrical conditions make the driver and voltage plan central to the specification. Most LED tape sold for cove lighting runs at 12 or 24 volts DC, so it needs a compatible constant-voltage supply; some systems use other proprietary arrangements. Because Australian premises use nominally 240-volt mains and Type I sockets, the installer must verify input voltage, earthing, circuit capacity and any certification required for the complete product.
Housing and ceiling construction also matter. Many projects involve brick veneer, rendered masonry or a concrete slab rather than a removable ceiling panel. It may be tempting to hide extra cable, a driver or strip in the roof space, but heat, insects, fire safety and future access all deserve attention. A licensed electrician should confirm the route and ensure insulation or combustible material does not cover the equipment.
In a compact Sydney or Melbourne terrace, a kitchen island or long living-room bulkhead may offer the best first run, and a modular arrangement can later reach a study or hallway. Brisbane’s warmer climate makes efficient, controllable output particularly valuable, as is a compatible summer mode for an alfresco ceiling. Local trade schedules and metric stock lengths can shape a staged renovation, so a “sparky” and installer can be booked early rather than after the joinery is signed off.
Sample boards and specification sheets are more useful when kept together. A short break on casual online entertainment can help reset the eye between suppliers, but return to the measured drawings, load calculation and diffuser options before approving anything.
Colour temperature, dimming and control
Warm-white strips provide the residential look most often associated with cove lighting. A tunable-white system can move from roughly 2200–3000 K for an evening scene through 3500–4000 K for a crisp kitchen or 5000–6500 K where a cooler task light is useful. Colour temperature changes the mood, but high colour rendering, including a strong R9 value for warm timber and skin tones, keeps the result natural.
Control affects the experience more than many buyers expect. Leading-edge and trailing-edge dimmers suit some trailing-compatible products, while DALI, Casambi, Zigbee, Bluetooth or manufacturer protocols support scheduling, scenes and app control. RGB or RGBW tape adds an accent layer for media rooms and restaurants, but dedicated task lighting remains better for chopping, reading and working. Motion sensors and timers can reduce energy use in corridors and stairwells.
Matching the system to everyday rooms
In a living room, keep the cove at a lower level and let the room’s main luminaires handle activities. A continuous glow can soften a large television wall or reveal joinery, but visible bright points or excessive contrast at the ceiling edge will undermine the calm effect. Layering ambient illumination with adjustable downlights gives greater control.
Bedrooms benefit from a warm, indirect wash behind a headboard or along a wardrobe bulkhead. Home offices need clearer output near the desk, and kitchens need shadow-free light over worktops; a dimmer or separate circuit prevents the decorative perimeter from being the only source. In every case, check glare from the diffuser and the reflection of the strip in glossy finishes.
Outdoor use calls for a different level of protection. Specify a system and diffuser approved for the exposed location, including suitable ingress protection, UV-stable materials and corrosion-resistant fixings. An indoor-rated strip may still be safe inside a sealed aluminium profile, but it should never be assumed suitable for an open alfresco. Consult the manufacturer’s environmental limits and have the final circuit checked for wet-area requirements.
Comparing installation approaches
Surface-mounted channels are the easiest option for an existing ceiling and can be painted to match. Recessed or semi-recessed profiles deliver the cleanest architectural line but require accurate cutting and careful finishing. Suspended linear systems suit high ceilings, angled planes and rooms where the light should become a visible design element.
| Approach |
Best suited to |
Light character |
Installation impact |
Relative cost |
| Clip-on or surface profile |
Existing ceilings and staged renovations |
Even glow with a visible linear edge |
Low; no ceiling cutting |
Low to medium |
| Semi-recessed profile |
Renovations with a modest ceiling recess |
Clean, partly concealed line |
Medium; accurate cutout and finishing |
Medium |
| Fully recessed channel |
New plaster ceilings and shadow-gap details |
Discreet wash with minimal visible hardware |
High; coordinated roof and ceiling work |
Medium to high |
| Suspended linear profile |
High rooms, stairs and angled planes |
Directional or decorative architectural light |
High; supports, power and suspension need design |
High |
The right choice depends on ceiling access, desired visibility and budget. Surface channels can conceal the strip while leaving the profile visible; recessed systems hide more hardware but make future changes harder. For rental properties or quick refreshes, a high-quality clip-on system is sensible. For a major renovation, integrating a planned circuit and accessible driver location can reduce future disruption.
A practical specification checklist
Before ordering, mark the ceiling perimeter and confirm which surface should receive the wash. Record profile dimensions, diffuser type, strip voltage, maximum run length, wattage, colour rendering and control method. A photometric or lumen figure is most useful when it refers to the finished system rather than the bare diodes.
Ask for samples and compare them after dark as well as during daylight. Warm and cool settings can look entirely different beneath a coloured ceiling. Check visible fixing points, the evenness of the run and whether the driver can be serviced without removing finishes.
- Measure every run and mark the exact profile position rather than estimating from one tape measure.
- Match the strip wattage, current and voltage to a driver with safe headroom while keeping the supply accessible.
- Plan for voltage drop on longer circuits using the manufacturer’s guidance and appropriate cable sizing.
- Specify colour rendering, CCT and beam angle as finished performance, not just as diode specifications.
- Define switching, dimming, sensors and app control before ordering compatible hardware.
- Allow for ventilation, service access and moisture protection, especially in kitchens, bathrooms and outdoor areas.
Personal design publishing often broadens into everyday subjects, as Tony Cucco’s online keno guidance demonstrates alongside the architecture, furniture and product coverage on his blog. For a cove-lighting project, begin with one clearly defined room: choose a profile and diffuser, map the circuit, set a comfortable dimming range and order a sample before the full kit. That measured first step gives the room a luminous architectural edge and leaves room to adapt the system later.